반응형
안녕하세요
코딩연습생입니다 정말 오랜만에 C# .Net으로 돌아왔습니다
회사에서 진행할려는 프로그램중 작업자가 터치로 사용해야할 프로그램인데
닷넷에서 제공해주는 일반 체크박스는 크기가 너무 작고 크기 조절도 불가능하여
나만의 체크박스 컨트롤을 만들어서 적용해야겠다라는 생각에 만들게 되었는데
저와 같이 필요하신분들을 위해 제작과정과 사용 방법에 대해서 포스팅 하도록 하겠습니다
물론 저도 처음부터 끝까지 제가 만든것은 아닙니다 검색하고 구현해보고 수정해서 나에게 필요한 형태로
변환해서 사용하는거죠
그러면 시작해보도록 하겠습니다
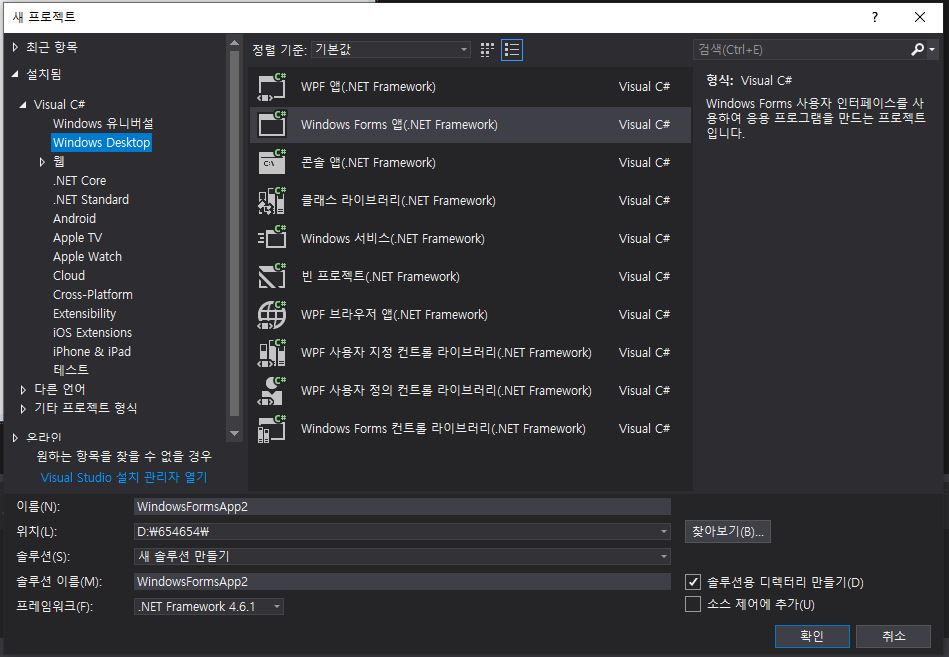
비쥬얼 스튜디오 2017(제가 사용한 버전입니다)를 실행해서 윈폼 형식의 프로젝트를 생성합니다
1. 프로젝트 생성하기

2. Windows Forms 형식의 폼을 생성합니다
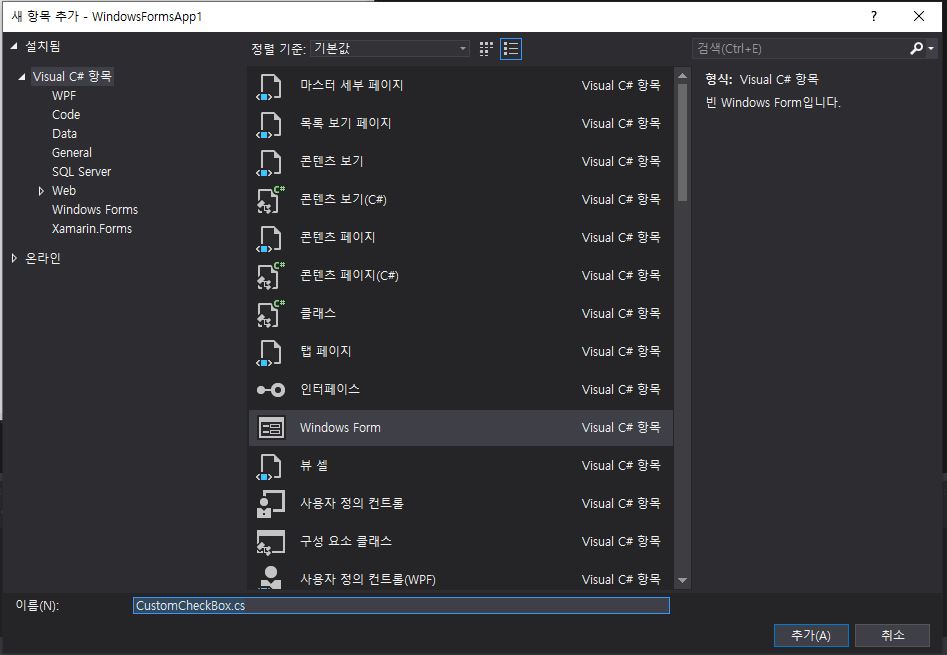
3. 프로젝트가 생성된 위치에 컨트롤로 사용할 윈폼 형식의 폼을 하나 추가해 줍니다

4. 추가할려는 폼의 명칭은 CustomCheckBox로 지정했습니다
5. 추가로 생성한 CustomCheckBox에 다음과 같이 코딩합니다
*CustomCheckBox.cs
using System;
using System.Collections.Generic;
using System.ComponentModel;
using System.Data;
using System.Drawing;
using System.Linq;
using System.Text;
using System.Threading.Tasks;
using System.Windows.Forms;
using System.Drawing;
using System.Drawing.Drawing2D;

namespace WindowsFormsApp1
{
    public partial class CustomCheckBox : System.Windows.Forms.Control
    {
        private bool _check = false;

        public bool Check
        {
            get
            {
                return _check;
            }
            set
            {
                _check = value;
                Invalidate();
            }
        }

        public CustomCheckBox()
        {
            InitializeComponent();
        }
        public CustomCheckBox(IContainer container)
        {
            container.Add(this);
            InitializeComponent();
        }
        protected override void OnPaint(PaintEventArgs pe)
        {
            Graphics g = pe.Graphics;

            g.FillRectangle(new SolidBrush(Color.Transparent), this.ClientRectangle);

            ControlPaint.DrawCheckBox(g, 1, 1, this.ClientRectangle.Height - 2, this.ClientRectangle.Height - 2, _check ? ButtonState.Checked : ButtonState.Normal);

            g.DrawString(this.Text, this.Font, new SolidBrush(Color.Black), this.ClientRectangle.Height + 2, (this.Height - g.MeasureString(this.Text, this.Font).Height) / 2);
        }
        private void CustomCheckBox_Click(object sender, System.EventArgs e)
        {
            _check = !_check;
            Invalidate();
        }

    }
}
*CustomCheckBox.Designer.cs
namespace WindowsFormsApp1
{
    partial class CustomCheckBox
    {
        /// <summary>
        /// 필수 디자이너 변수입니다.
        /// </summary>
        private System.ComponentModel.IContainer components = null;

        /// <summary>
        /// 사용 중인 모든 리소스를 정리합니다.
        /// </summary>
        /// <param name="disposing">관리되는 리소스를 삭제해야 하면 true이고, 그렇지 않으면 false입니다.</param>
        protected override void Dispose(bool disposing)
        {
            if (disposing && (components != null))
            {
                components.Dispose();
            }
            base.Dispose(disposing);
        }

        #region 구성 요소 디자이너에서 생성한 코드

        /// <summary>
        /// 디자이너 지원에 필요한 메서드입니다.
        /// 이 메서드의 내용을 코드 편집기로 수정하지 마십시오.
        /// </summary>
        private void InitializeComponent()
        {
            components = new System.ComponentModel.Container();
            this.Click += new System.EventHandler(this.CustomCheckBox_Click);
        }

        #endregion
    }
}
6. 빌드 후 Form1의 폼 디자인으로 이동한 다음 도구상자를 열어보시면 다음과 같은 컨트롤이 생성됩니다

7. CustomCheckBox 컨트롤을 드래그앤드롭하여 Form1에 가져갑니다

그렇게 하면 상하좌우 크기 조절이 가능한 커스텀 체크박스 컨트롤을 사용할 수 있습니다
반응형
'코딩정보 > C#' 카테고리의 다른 글
| [C#] 엑셀 Cells 사용시 속도 문제 해결하기 (3) | 2020.04.14 |
|---|---|
| [C#] 엑셀 템플릿파일 불러오기 및 값 넣기 (0) | 2020.04.06 |
| [C#] MSSQL 접속하고 사용하기 (2) | 2020.01.17 |
| [C#]OpenCvSharp 라이브러리 사용하기 #1 (0) | 2019.12.30 |
| [C#] OpenCvSharp 이미지 읽어 오기 (1) | 2019.12.24 |


